Helm v2
Helm
Helm은 쿠버네티스 패키지 관리 툴이다.
chart라고 부르는, 이미 만들어 놓은 패키지 명세서를 이용해서 손쉽게 애플리케이션을 배포하고 관리할 수 있다.
사용의 편의성을 제공하기는 하지만, v2까지는 권한 문제로 인해서 약간의 불편한 점이 있다.
멀티 테넌시 환경의 쿠버네티스 클러스터에서 사용할 경우, 각 사용자의 권한별로 리소스 접근을 제어하기가 힘들다.
네임스페이스별로 tiller를 설치하고, 인증서를 관리할 수 있지만, 상당히 불편하다.
이러한 문제의 근본적인 이유는 패키지 설치를 실행하는 사용자의 권한으로 리소스를 설치하는 것이 아니라,
tiller가 가진 권한으로 리소스가 설치되기 때문이다.
즉, 나에게 권한이 없어도, tiller에 권한이 있다면, 내 권한 밖의 리소스를 제어할 수 있는것이다.
다행히도 새로 만들어진 v3 부터는 이러한 문제가 해결될 것으로 보인다.
이 글을 쓰는 시점에서는 아직 v3가 정식 릴리즈 되지 않았다.
그래서 어쩔 수 없이 v2를 사용하였고, v2을 멀티 테넌시 환경에서 사용하기 쉽도록 하기 위해서 kubeapps을 사용했다.
Kubeapps
Kubeapps는 쿠버네티스트 클러스터에 애플리케이션을 배포하고 관리할 수 있게 도와주는 웹 기반의 UI 애플리케이션이다.
Kubeapps는 ‘helm chart’를 사용할 수 있을 뿐 아니라, 사용자 기반의 권한 제어 기능도 제공한다.
준비물
- RBAC 기반의 쿠버네티스 클러스터
- OIDC Provider + 쿠버네티스 연동
Helm 설치하기
Helm 설치
‘helm’을 설치한다.
개발 환경이 mac이라서 brew를 사용해서 간단히 설치하였다. 환경이 다르다면, helm 문서를 참고하길 바란다.
$ brew install kubernetes-helm
Using SSL/TLS Between Helm and Tiller
‘helm’ v2를 사용려면, 쿠버네티스 클러스터에 Tiller가 설치되어 있어야한다.
기본값으로 Tiller를 설치할 경우 보안상의 문제가 있기때문에 TLS 인증서를 사용하는 형태로 설치한다.
CA 만들기
openssl 툴을 이용해서, CA를 생성한다.
- CA용 개인키를 생성한다.
$ openssl genrsa -out ./ca.key.pem 4096 Generating RSA private key, 4096 bit long modulus ..........................++ .........................................++ e is 65537 (0x010001) - CA용 인증서를 생성한다.
$ openssl req -key ca.key.pem -new -x509 -days 7300 -sha256 -out ca.cert.pem -extensions v3_ca
You are about to be asked to enter information that will be incorporated
into your certificate request.
What you are about to enter is what is called a Distinguished Name or a DN.
There are quite a few fields but you can leave some blank
For some fields there will be a default value,
If you enter '.', the field will be left blank.
-----
Country Name (2 letter code) [AU]:KR
State or Province Name (full name) [Some-State]:Gyeonggi-do
Locality Name (eg, city) []:Seongnam
Organization Name (eg, company) [Internet Widgits Pty Ltd]:tiller
Organizational Unit Name (eg, section) []:
Common Name (e.g. server FQDN or YOUR name) []:tiller
Email Address []:tiller@example.com
이렇게 생성한 CA를 이용해서,
Tiller와Helm client을 인증서를 만들것이다.
Tiller 인증서 만들기
- Tiller용 개인키를 생성한다.
$ openssl genrsa -out ./tiller.key.pem 4096
Generating RSA private key, 4096 bit long modulus
..........................................................++
.................................++
e is 65537 (0x010001)
- Tiller용 인증서를 생성한다.
$ openssl req -key tiller.key.pem -new -sha256 -out tiller.csr.pem
You are about to be asked to enter information that will be incorporated
into your certificate request.
What you are about to enter is what is called a Distinguished Name or a DN.
There are quite a few fields but you can leave some blank
For some fields there will be a default value,
If you enter '.', the field will be left blank.
-----
Country Name (2 letter code) [AU]:KR
State or Province Name (full name) [Some-State]:Gyeonggi-do
Locality Name (eg, city) []:Seongnam
Organization Name (eg, company) [Internet Widgits Pty Ltd]:Tiller Server
Organizational Unit Name (eg, section) []:
Common Name (e.g. server FQDN or YOUR name) []:tiller-server
Email Address []:

Please enter the following 'extra' attributes
to be sent with your certificate request
A challenge password []:
An optional company name []:
- Tiller용 인증서를 CA의 인증서로 서명한다.
$ openssl x509 -req -CA ca.cert.pem -CAkey ca.key.pem -CAcreateserial -in tiller.csr.pem -out tiller.cert.pem -days 365
Signature ok
subject=C = KR, ST = Gyeonggi-do, L = Seongnam, O = Tiller Server, CN = tiller-server
Getting CA Private Key
Helm client 인증서 만들기
- Helm client용 개인키를 생성한다.
$ openssl genrsa -out ./helm.key.pem 4096
  Generating RSA private key, 4096 bit long modulus
  ..................................++
  ......................................++
  e is 65537 (0x010001)
- Helm client용 인증서를 생성한다.
openssl req -key helm.key.pem -new -sha256 -out helm.csr.pem
You are about to be asked to enter information that will be incorporated
into your certificate request.
What you are about to enter is what is called a Distinguished Name or a DN.
There are quite a few fields but you can leave some blank
For some fields there will be a default value,
If you enter '.', the field will be left blank.
-----
Country Name (2 letter code) [AU]:KR
State or Province Name (full name) [Some-State]:Gyeonggi-do
Locality Name (eg, city) []:Seongnam
Organization Name (eg, company) [Internet Widgits Pty Ltd]:Helm Client
Organizational Unit Name (eg, section) []:
Common Name (e.g. server FQDN or YOUR name) []:helm-client
Email Address []:

Please enter the following 'extra' attributes
to be sent with your certificate request
A challenge password []:
An optional company name []:
- Helm client용 인증서를 CA의 인증서로 서명한다.
$ openssl x509 -req -CA ca.cert.pem -CAkey ca.key.pem -CAcreateserial -in helm.csr.pem -out helm.cert.pem -days 365
Signature ok
subject=C = KR, ST = Gyeonggi-do, L = Seongnam, O = Helm Client, CN = helm-client
Getting CA Private Key
서비스 어카운트 만들기
‘Tiller’가 사용할 serviceaccount를 생성하고, cluster-admin 클러스터롤(ClusterRole)을 바인딩해준다.
cat <<EOF | kubectl apply -f -
apiVersion: v1
kind: ServiceAccount
metadata:
  name: tiller
  namespace: kube-system
---
apiVersion: rbac.authorization.k8s.io/v1
kind: ClusterRoleBinding
metadata:
  name: tiller
roleRef:
  apiGroup: rbac.authorization.k8s.io
  kind: ClusterRole
  name: cluster-admin
subjects:
  - kind: ServiceAccount
    name: tiller
    namespace: kube-system
EOF
Tiller 설치하기
생성한 인증서와 서비스어카운트를 지정하여, ‘Tiller’를 설치한다.
설치 명령어는 다음과 같다.
$ helm init --service-account tiller --tiller-tls --tiller-tls-cert ./tiller.cert.pem --tiller-tls-key ./tiller.key.pem --tiller-tls-verify --tls-ca-cert ca.cert.pem
설치가 완료되면, helm ls명령어를 실행해 본다. 다음과 같은 에러가 발생하면 정상적으로 설치한 것이다.
$ helm ls
Error: transport is closing
Helm client 설정하기
설치한 ‘Tiller’는 TLS 로 보호받고 있기 때문에, helm 클라이언트로 접근하려면 인증서를 지정해 줘야한다.
가장 간단한 방법은 인증서 정보를 모두 지정해 주는 것이다.
$ helm ls --tls --tls-ca-cert ca.cert.pem --tls-cert helm.cert.pem --tls-key helm.key.pem
매번 인증서를 지정해주는것은 불편하기 때문에, 인증서를 $HELM_HOME에 복사해 놓으면 좀 더 쉽게 사용할 수 있다.
$ export HELM_HOME=/Users/kangwoo/.helm
$ cp ca.cert.pem $HELM_HOME/ca.pem
$ cp helm.cert.pem $HELM_HOME/cert.pem
$ cp helm.key.pem $HELM_HOME/key.pem
인증서를 $HELM_HOME에 복사하였다면, helm을 실행할때 --tls만 붙여주면 된다.
$ helm ls --tls
Kubeapps 설치하기
helm을 사용해서 kubeapps를 설치할 것이다.
tiller의 tls와 OIDC 인증을 위해서 values.yaml값을 수정해 준다.
- App Version: v1.5.0
- Chart Version: 2.1.2
ingress 설절하기
ingress를 사용하기 위해서 설정해준다.
ingress.enabled를 true로 변경하고, ingress.hosts.name을 설정한다.
ingress:
  enabled: true
...
  hosts:
    - name: kubeapps.xxx.com
      path: /
tillerProxy tls 설정하기
tillerProxy.tls.verify을 true로 변경하고,
tillerProxy.tls.ca, tillerProxy.tls.cert, tillerProxy.tls.key 값을 설정한다.
- tillerProxy.tls.ca=”$(cat ca.cert.pem)”
- tillerProxy.tls.cert=”$(cat helm.cert.pem)”
- tillerProxy.tls.key=”$(cat helm.key.pem)”
...
tillerProxy:
  replicaCount: 2
  image:
    registry: docker.io
    repository: bitnami/kubeapps-tiller-proxy
    tag: 1.5.0-r0
  service:
    port: 8080
  host: tiller-deploy.kube-system:44134
  tls:
    ca: |-
      -----BEGIN CERTIFICATE-----
      MIIF1zCCA7+gAwIBAgIJAPrXoUYpgyDEMA0GCSqGSIb3DQEBCwUAMIGBMQswCQYD
      ...
      -----END CERTIFICATE-----
    cert: |-
      -----BEGIN CERTIFICATE-----
      MIIFYDCCA0gCCQCnyMMmF4lKHzANBgkqhkiG9w0BAQsFADCBgTELMAkGA1UEBhMC
      ...
      -----END CERTIFICATE-----
    key: |-
      -----BEGIN RSA PRIVATE KEY-----
      MIIJKgIBAAKCAgEA3Mb/4vvMqMVouSV2wLOX94R2okP0rcswLBUGR66asD1CLIa/
      ...
      -----END RSA PRIVATE KEY-----
    verify: true
...
OIDC 인증 활성화하기
쿠버네티스 클러스터에서 사용하는 OIDC Provider를 authProxy에 설정해준다.
그래야 kubeapps 웹 UI 화면에 접속할 때, 로그인을 할 수 있고 해당 토큰으로 kubeapps를 사용할 수 있다.
authProxy.enabled을 true로 변경하고,
authProxy.discoveryURL, authProxy.clientID, authProxy.clientSecret의 값을 설정한 후,
authProxy.additionalFlags에 --secure-cookie=false, --scopes=openid groups email을 추가해 준다.
...
authProxy:
  # Set to true to enable the OIDC proxy
  enabled: true
  # Image used for the proxy
  image:
    registry: docker.io
    repository: bitnami/keycloak-gatekeeper
    tag: 2.3.0-r1
  # Mandatory parametes
  discoveryURL: https://REPLACE_URL
  clientID: REPLACE_CLIENT_ID
  clientSecret: REPLACE_CLIENT_SECRET
  # Additional flags for Keycloak-Gatekeeper
  additionalFlags:
    - --secure-cookie=false
    - --scopes=openid groups email
$ helm install -f values.yaml bitnami/kubeapps \
  --namespace kubeapps --name kubeapps \
  --tls


NAME:   kubeapps
LAST DEPLOYED: Tue Sep 10 19:45:04 2019
NAMESPACE: kubeapps
STATUS: DEPLOYED

RESOURCES:
==> v1/ConfigMap
NAME                                DATA  AGE
kubeapps-frontend-config            1     1s
kubeapps-internal-dashboard-config  2     1s

==> v1/Pod(related)
NAME                                                        READY  STATUS             RESTARTS  AGE
kubeapps-86cd959cc8-knbwk                                   0/2    ContainerCreating  0         1s
kubeapps-86cd959cc8-mtgqc                                   0/2    Pending            0         1s
kubeapps-internal-apprepository-controller-77cc98bcc-8s5dv  0/1    ContainerCreating  0         1s
kubeapps-internal-chartsvc-7fc7bc4fc5-4ssdx                 0/1    ContainerCreating  0         1s
kubeapps-internal-chartsvc-7fc7bc4fc5-n4x65                 0/1    ContainerCreating  0         1s
kubeapps-internal-dashboard-5df4c549b9-dckw2                0/1    Pending            0         1s
kubeapps-internal-dashboard-5df4c549b9-qlvjl                0/1    ContainerCreating  0         1s
kubeapps-internal-tiller-proxy-68c5cb8998-fnfbg             0/1    Pending            0         1s
kubeapps-internal-tiller-proxy-68c5cb8998-rgc6x             0/1    ContainerCreating  0         1s
kubeapps-mongodb-85f58746ff-d6p5g                           0/1    ContainerCreating  0         1s

==> v1/Secret
NAME                            TYPE    DATA  AGE
kubeapps-internal-tiller-proxy  Opaque  3     1s

==> v1/Service
NAME                            TYPE       CLUSTER-IP      EXTERNAL-IP  PORT(S)    AGE
kubeapps                        ClusterIP  172.30.67.115   <none>       80/TCP     1s
kubeapps-internal-chartsvc      ClusterIP  172.31.216.84   <none>       8080/TCP   1s
kubeapps-internal-dashboard     ClusterIP  172.30.205.251  <none>       8080/TCP   1s
kubeapps-internal-tiller-proxy  ClusterIP  172.31.13.240   <none>       8080/TCP   1s
kubeapps-mongodb                ClusterIP  172.30.33.149   <none>       27017/TCP  1s

==> v1/ServiceAccount
NAME                                        SECRETS  AGE
kubeapps-internal-apprepository-controller  1        1s
kubeapps-internal-tiller-proxy              1        1s

==> v1beta1/Deployment
NAME              READY  UP-TO-DATE  AVAILABLE  AGE
kubeapps-mongodb  0/1    1           0          1s

==> v1beta1/Ingress
NAME      HOSTS                                 ADDRESS  PORTS  AGE
kubeapps  kubeapps.xxx.com  80       1s

==> v1beta1/Role
NAME                                        AGE
kubeapps-internal-apprepository-controller  1s
kubeapps-internal-tiller-proxy              1s
kubeapps-repositories-read                  1s
kubeapps-repositories-write                 1s

==> v1beta1/RoleBinding
NAME                                        AGE
kubeapps-internal-apprepository-controller  1s
kubeapps-internal-tiller-proxy              1s

==> v1beta2/Deployment
NAME                                        READY  UP-TO-DATE  AVAILABLE  AGE
kubeapps                                    0/2    2           0          1s
kubeapps-internal-apprepository-controller  0/1    1           0          1s
kubeapps-internal-chartsvc                  0/2    2           0          1s
kubeapps-internal-dashboard                 0/2    2           0          1s
kubeapps-internal-tiller-proxy              0/2    2           0          1s


NOTES:
** Please be patient while the chart is being deployed **

Tip:

  Watch the deployment status using the command: kubectl get pods -w --namespace kubeapps

Kubeapps can be accessed via port 80 on the following DNS name from within your cluster:

   kubeapps.kubeapps.svc.cluster.local

To access Kubeapps from outside your K8s cluster, follow the steps below:

1. Get the Kubeapps URL and associate Kubeapps hostname to your cluster external IP:

   export CLUSTER_IP=$(minikube ip) # On Minikube. Use: `kubectl cluster-info` on others K8s clusters
   echo "Kubeapps URL: http://kubeapps.xxx.com/"
   echo "$CLUSTER_IP  kubeapps.xxx.com" | sudo tee -a /etc/hosts

2. Open a browser and access Kubeapps using the obtained URL.
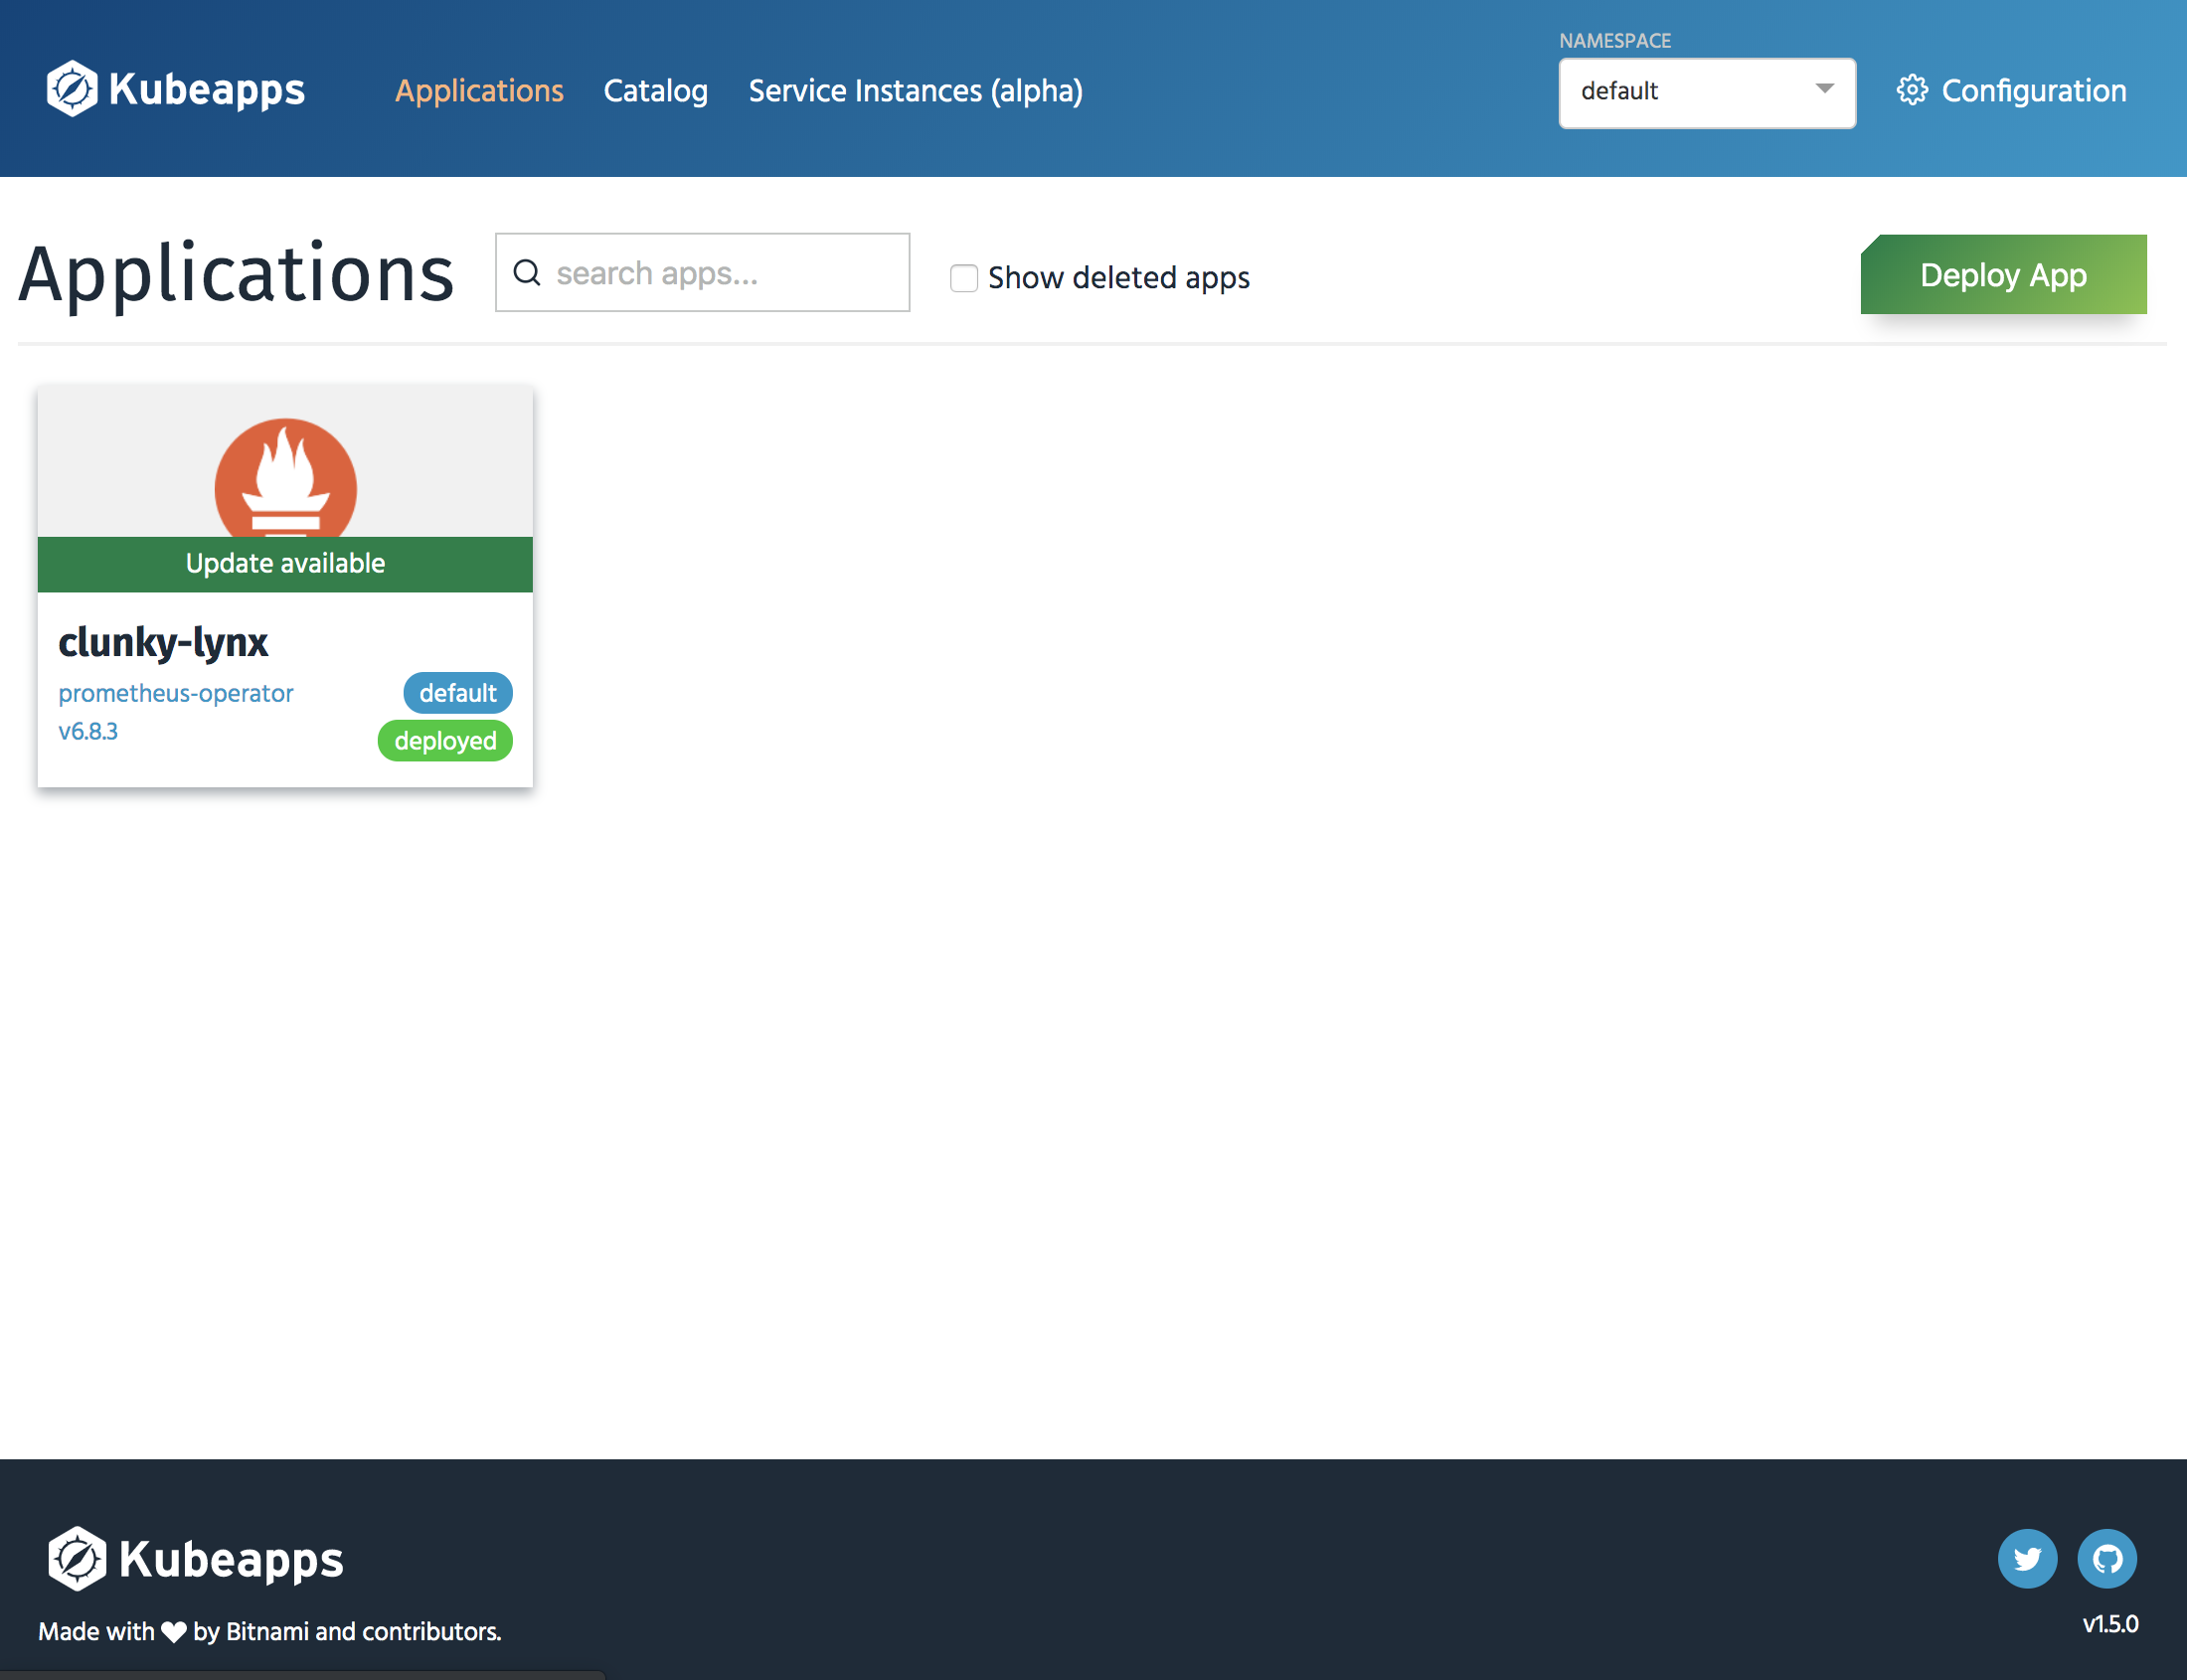
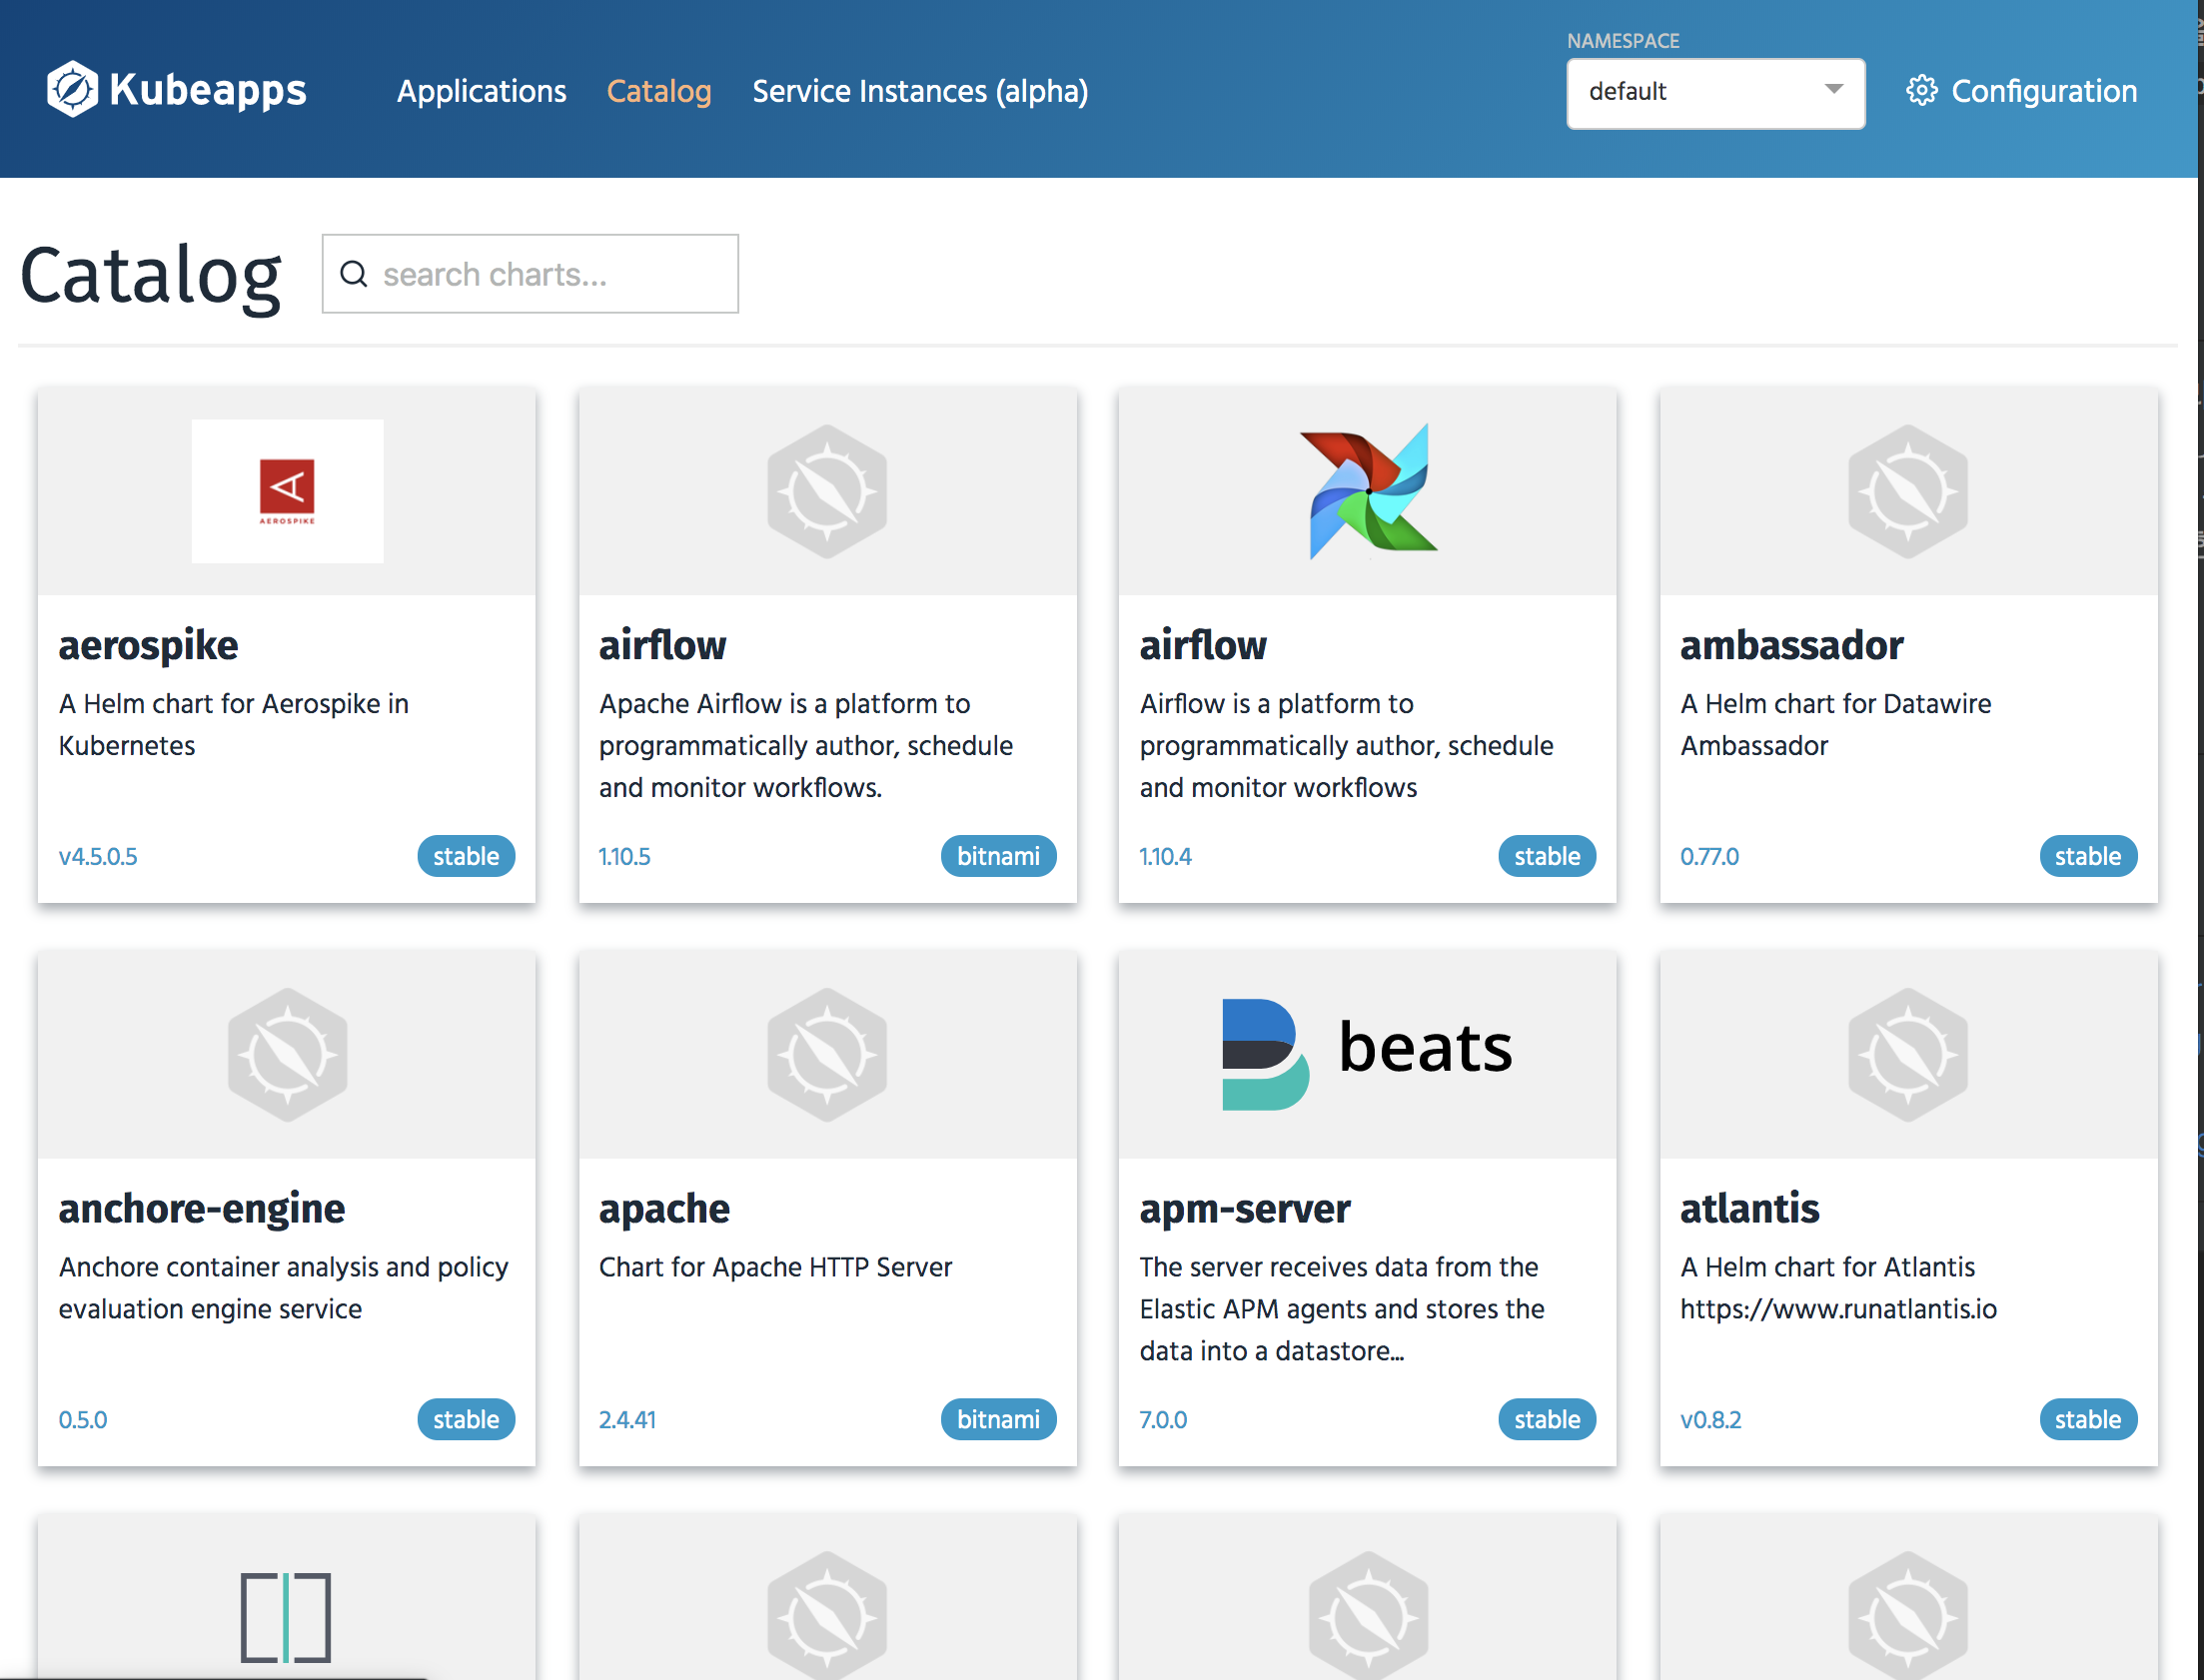
ingress에 설정한 주소로 접속하면 kubeapps를 사용할 수 있다.